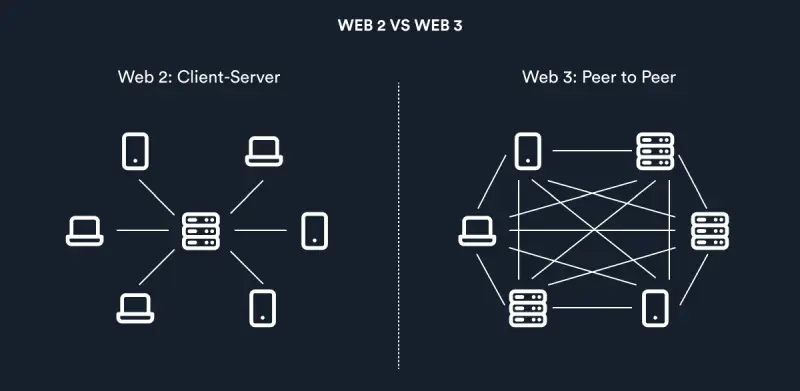
In the rapidly evolving world of blockchain technology and decentralized applications (DApps), a Web3 wallet is an essential tool for interacting with the decentralized web. Whether you want to store cryptocurrencies, engage in decentralized finance (DeFi), or explore non-fungible tokens (NFTs), setting up a Web3 wallet is the first step. In this guide, we will take you through the detailed process of setting up your first Web3 wallet to ensure security and ease of use. Below we are going to see how to set up your first Web3 Wallet
What is a Web3 Wallet?
A Web3 wallet is a digital tool that allows users to store, send, and receive cryptocurrencies while interacting with decentralized applications (DApps) on the blockchain. Unlike traditional wallets, Web3 wallets provide users with complete control over their funds, eliminating the need for intermediaries such as banks. Some popular Web3 wallets include MetaMask, Trust Wallet, Coinbase Wallet, and Ledger Live.
Step-by-Step Guide to Setting Up Your First Web3 Wallet
First Step: Choose the Right Web3 Wallet
There are different types of Web3 wallets, and selecting the right one depends on your needs. The two main categories are:
- Hot Wallets (Software-Based): These are connected to the internet and include browser extensions and mobile apps, such as MetaMask and Trust Wallet.
- Cold Wallets (Hardware-Based): These are offline storage options, such as Ledger Nano X and Trezor, providing additional security for long-term storage.
For beginners, we recommend starting with MetaMask, as it is widely used and supported across various DApps.
Second Step: Download and Install the Wallet
- Visit the official website of the Web3 wallet you chose.
- Download the wallet as a browser extension (Chrome, Firefox, or Edge) or mobile application (iOS and Android).
- Install the wallet and ensure you are using the official version to avoid scams.
Third Step: Create a New Wallet
- Open the wallet application and select “Create a New Wallet.”
- You may be asked to set a strong password—ensure you use a unique, complex password that is not used elsewhere.
- Backup your Secret Recovery Phrase (Seed Phrase).
- The seed phrase is a 12 to 24-word phrase that acts as a master key to your wallet.
- Write it down on paper and store it in a safe, offline location.
- Never share your seed phrase with anyone, as it can be used to access your funds.
Fourth Step: Secure Your Wallet
To ensure the safety of your digital assets, follow these security best practices:
- Enable Two-Factor Authentication (2FA) where possible.
- Use a hardware wallet for long-term storage.
- Beware of phishing attacks—never enter your seed phrase on any website or app apart from your wallet.
- Regularly update your wallet software to protect against vulnerabilities.
Fifth Step: Fund Your Web3 Wallet
Once your wallet is set up, you need to add cryptocurrency to start using it. Follow these steps:
- Obtain your wallet address (a string of alphanumeric characters that starts with “0x” for Ethereum-based wallets).
- Buy cryptocurrency from a trusted exchange like Binance, Coinbase, or Kraken.
- Withdraw the funds to your Web3 wallet address.
- Wait for the transaction to be confirmed on the blockchain.
Sixth Step: Connect Your Wallet to DApps
Now that you have funded your Web3 wallet, you can start exploring the decentralized web:
- Open a DApp (e.g., OpenSea for NFTs, Uniswap for DeFi, or Axie Infinity for gaming).
- Click on “Connect Wallet.”
- Select your Web3 wallet (e.g., MetaMask) and approve the connection.
- Start interacting with the DApp, whether it’s trading NFTs, staking tokens, or swapping assets.

Best Web3 Wallets for Beginners
Here are some top beginner-friendly Web3 wallets:
- MetaMask – Best for Ethereum-based DApps.
- Trust Wallet – Ideal for mobile users.
- Coinbase Wallet – Great for integration with Coinbase Exchange.
- Ledger Nano X – Best for hardware security.
- Trezor Model T – Another secure hardware wallet option.
Common Issues and Troubleshooting Tips
- Wallet Not Connecting to DApps
- Refresh your browser and try reconnecting.
- Update your browser extension.
- Clear your cache and cookies.
- Transaction Stuck in Pending
- Increase the gas fee to speed up confirmation.
- Check for network congestion on Etherscan or BSCScan.
- Lost Seed Phrase
- Unfortunately, there is no recovery option without a backup.
- If you still have access, transfer funds to a new wallet immediately.
Conclusion
Setting up a Web3 wallet is a crucial step toward engaging with blockchain technology and decentralized applications. By following the steps outlined in this guide, you can securely create, fund, and use your first Web3 wallet with confidence. Always prioritize security measures, store your seed phrase safely, and be cautious of scams to protect your digital assets.

